If you've ever uploaded a video or blog post and wondered why no one clicks on it — your thumbnail might be the problem. The best image cropping techniques for thumbnails can be the difference between someone scrolling past your content and someone clicking on it right away. A good thumbnail grabs attention in less than a second. It shows people exactly what they're going to get. And it starts with smart, precise cropping.
In this guide, you'll learn how to crop your thumbnail images the right way — for YouTube, blogs, social media, and more. No confusing tech talk. Just clear, practical steps you can use today.
Why Thumbnail Cropping Actually Matters
Think about the last time you scrolled through YouTube or Pinterest. You probably didn't read every title. Instead, your eyes jumped from image to image until something caught your attention. That's exactly how most people browse online. The thumbnail is the first thing they see. If it looks blurry, awkwardly framed, or hard to understand, they move on. Cropping isn't just about trimming an image. It's about choosing what to show and what to cut out. The best image cropping techniques for thumbnails help you remove distractions, center the subject, and create a frame that feels natural and powerful.Quick fact: According to YouTube's Creator Academy, 90% of the best-performing videos on the platform use custom thumbnails. The way you crop and design your thumbnail has a direct impact on your click-through rate (CTR).
The Most Popular Thumbnail Sizes and Aspect Ratios
Before you even start cropping, you need to know the right size. Every platform has its own rules. If you crop to the wrong dimensions, your thumbnail might get cut off or look stretched.Common Thumbnail Aspect Ratios by Platform
16:9
YouTube, Blogs
1:1
Instagram, Facebook
4:5
Instagram Portrait
9:16
TikTok, Reels
3:2
Pinterest, Blogs
| Platform | Recommended Size | Aspect Ratio | Max File Size |
|---|---|---|---|
| YouTube | 1280 × 720 px | 16:9 | 2 MB |
| 1200 × 630 px | 1.9:1 | 8 MB | |
| Instagram (Post) | 1080 × 1080 px | 1:1 | 30 MB |
| Twitter/X | 1200 × 675 px | 16:9 | 5 MB |
| 1000 × 1500 px | 2:3 | 20 MB | |
| Blog Post (Featured) | 1200 × 628 px | 1.91:1 | Varies |
| TikTok Cover | 1080 × 1920 px | 9:16 | 50 MB |
Core Image Cropping Techniques Every Creator Should Know
Now let's get into the real meat of this guide — the actual cropping techniques. These are the methods used by professional designers and top content creators.1. The Rule of Thirds — the Most Used Cropping Grid
The rule of thirds is one of the oldest tricks in photography and design. You divide the image into a 3×3 grid — nine equal boxes. Then you place your main subject at one of the four points where the lines cross. Why does this work? Because it feels natural to the human eye. Centered subjects can look stiff or boring. Off-center subjects feel dynamic and interesting. When applying the best image cropping techniques for thumbnails, the rule of thirds is your starting point. Crop the image so your subject lands on one of those intersection points, not dead center.How to do it: Most cropping tools — including Canva, Photoshop, and even mobile apps — have a grid overlay option. Turn it on before you crop.
2. Face-Centered Cropping for Maximum Emotion
Faces are one of the strongest visual elements you can use in a thumbnail. People are wired to look at faces. A surprised face, a smiling face, or even a shocked expression makes people curious. Face-centered cropping means zooming in close to the face so the emotion is clearly visible — even on small screens. This is especially important for YouTube thumbnails, which can be as small as 168 × 94 px in some views. Cut out the background clutter. Bring the face close. Make sure the eyes are sharp and clear. This alone can dramatically boost your click-through rate.3. Subject Isolation — Cut the Background, Keep the Focus
Sometimes the background of your photo is distracting. There might be random objects, people in the background, or a messy room. Subject isolation means cropping tightly around your main subject so the background disappears — or at least becomes much less noticeable. This technique is widely used in product thumbnails and tutorial videos. The cleaner the frame, the faster viewers understand what they're looking at.4. The Golden Ratio for Natural Balance
The golden ratio (roughly 1:1.618) is a mathematical proportion found in nature — in seashells, flowers, and even the human face. When used in design, it creates a sense of natural harmony. You can use the golden spiral overlay in tools like Adobe Lightroom or Photoshop. Position your subject along the spiral's curve. It sounds complex, but the result is a crop that just feels right without knowing exactly why.5. Lead Room (or "Nose Room") Cropping
If your subject is looking to one side, you should leave more space in the direction they're looking. This is called "lead room." It feels like the person has somewhere to look — and gives the image a sense of movement and energy. Without lead room, the image feels cramped. The viewer's eye gets stuck. Always crop so your subject has space in front of their gaze.6. Tight Crop vs. Wide Crop — When to Use Each
| Crop Type | Best Used For | Effect on Viewer |
|---|---|---|
| Tight Crop | Faces, emotions, product close-ups | Creates intimacy and urgency |
| Medium Crop | Tutorials, how-to content | Shows context and hands/tools |
| Wide Crop | Travel, events, landscapes | Gives sense of scale and place |
Tools That Make Thumbnail Cropping Easy
You don't need to be a professional designer to crop thumbnails well. There are fantastic tools — both free and paid — that make the process quick and simple.Free Tools for Beginner Creators
- Canva — Drag-and-drop interface with preset thumbnail sizes. Great for beginners. Visit Canvix.io for more design tips and tutorials to level up your thumbnail game.
- Adobe Express — Free version offers solid cropping and basic editing tools.
- Snapseed — Mobile app with smart cropping and subject selection.
- GIMP — Free desktop software with advanced cropping grid overlays.
Professional Tools for Advanced Creators
- Adobe Photoshop — The industry standard. Offers every cropping technique mentioned in this guide.
- Adobe Lightroom — Best for photographers. Includes golden ratio and rule-of-thirds crop overlays.
- Figma — Great for web designers who want pixel-perfect thumbnails.
Step-by-Step: How to Crop a Thumbnail the Right Way
Let's walk through the process from start to finish. These steps work for most tools, including Canva and Photoshop.- Choose your platform first. Know the exact dimensions before you open your image.
- Import your image at the highest resolution possible. Low-resolution images get blurry when cropped and zoomed in.
- Turn on the crop grid overlay. Use the rule of thirds as your guide.
- Identify your subject. Ask yourself: what is the single most important element in this image?
- Position the subject on a grid intersection (or use face-center cropping if it's a portrait).
- Remove distracting edges. If there's clutter near the border, crop it out.
- Check the negative space. Make sure there's breathing room around the subject.
- Export at the recommended resolution. For YouTube, that's 1280 × 720 px minimum.
Common Thumbnail Cropping Mistakes (and How to Fix Them)
Even experienced creators make these mistakes. Here's what to watch out for — and how to quickly fix each one.Cropping Too Much of the Subject
Cutting off the top of someone's head, or slicing through their chin, looks unprofessional. Always leave a small margin above the head (about 5–10% of the frame height).Fix it: Zoom out slightly before cropping. Give your subject a bit of breathing room at the top and sides.
Centering Everything Without Intention
Putting every element dead center makes the image look flat. Use the rule of thirds instead — it automatically makes the composition feel more alive.Using the Wrong Aspect Ratio
If you crop a horizontal image for a vertical platform (like TikTok), the sides will get cut off or the image will look squeezed. Always match your crop to the platform's required ratio before editing.Ignoring Text Placement While Cropping
If you're going to add text to your thumbnail (which most creators do), you need to leave room for it. Crop in a way that creates negative space — usually on the left or bottom — where text can sit without covering the main subject.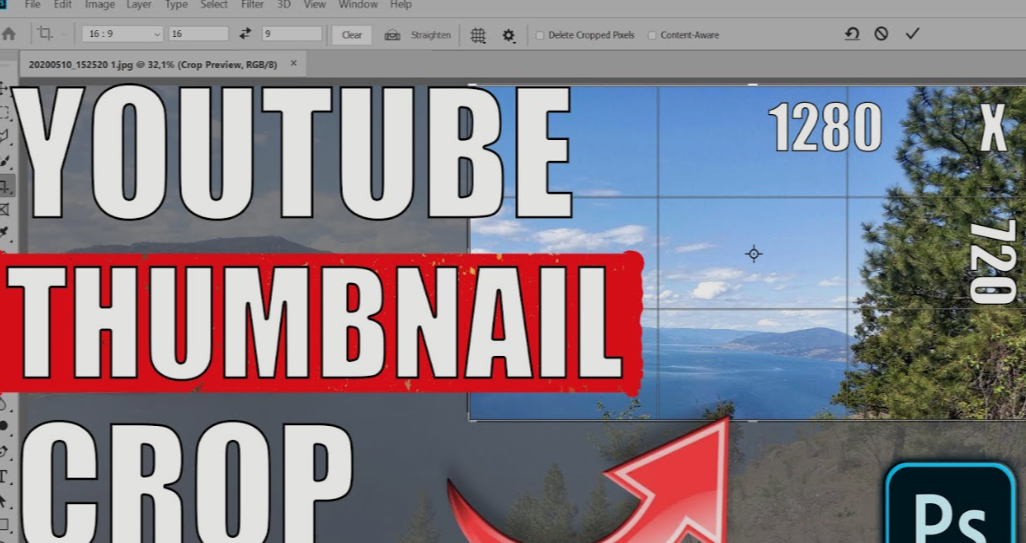
Low Resolution After Cropping
Cropping reduces the total number of pixels in your image. If you start with a low-resolution photo and crop a lot, the final thumbnail will look pixelated. Always start with high-resolution source images — at least 1920 × 1080 px.| Mistake | Why It Hurts | Quick Fix |
|---|---|---|
| Cropping off the head | Looks amateurish | Leave 5–10% space above subject |
| Centered everything | Flat, boring composition | Use rule of thirds |
| Wrong aspect ratio | Image gets cut or stretched | Set ratio before cropping |
| No room for text | Text covers subject | Crop with negative space in mind |
| Starting with low-res | Blurry final thumbnail | Use 1920×1080 or higher source |
How Thumbnail Cropping Affects Click-Through Rate (CTR)
CTR is the percentage of people who see your thumbnail and click on it. It's one of the most important metrics for any content creator. The best image cropping techniques for thumbnails directly improve CTR because they:- Make your subject instantly recognizable
- Remove visual noise that confuses viewers
- Create emotional connection through facial expression
- Guide the viewer's eye naturally toward the main point
Advanced Cropping Techniques for Power Users
Cinematic Letterbox Cropping
This technique uses a wider-than-usual crop (like 2.39:1) to create a cinematic, movie-poster feel. It's great for gaming content, travel vlogs, and film-style thumbnails. The letterbox format feels premium and high-effort — which makes viewers take your content more seriously.Diagonal Cropping for Energy and Movement
Most people crop perfectly horizontally. But a slight diagonal tilt (3–7 degrees) adds energy and a sense of urgency to the image. It's a subtle trick, but it makes the thumbnail feel more dynamic. Use it for action content, sports, or hype-style thumbnails.Split-Frame Cropping for Comparisons
This technique divides the thumbnail into two halves — a before/after, two different options, or two contrasting ideas. Crop each image to fill exactly half the frame. This is one of the most effective formats for tutorial thumbnails, transformation videos, and comparison content.Color-Aware Cropping
Crop your image so the dominant colors sit in the most visually powerful areas — usually the left side and the top. The human eye reads images the same way it reads text: left to right, top to bottom. If your most colorful or interesting element is in the bottom-right corner, consider re-cropping to move it to the top-left.Thumbnail Cropping for Different Content Types
Different types of content call for different cropping strategies. Here's a quick breakdown:| Content Type | Recommended Crop Style | Key Focus Area |
|---|---|---|
| YouTube Tutorial | Medium crop with hands/tools visible | Subject + action |
| Reaction Video | Tight face crop | Emotion |
| Travel Vlog | Wide crop showing location | Environment |
| Product Review | Subject isolation (product center) | Product clarity |
| Fitness/Health | Before/after split crop | Transformation |
| Gaming | Cinematic wide or face + game | Drama/excitement |
| Food/Cooking | Close-up macro crop | Texture and color |
| Educational Blog | Simple subject isolation | Clarity |
Cropping Tips Specifically for Mobile Thumbnails
More than 70% of YouTube views now come from mobile devices. This changes how you should think about cropping. On a mobile screen, thumbnails are tiny — sometimes as small as a postage stamp. That means:- Tight crops work better than wide ones on mobile
- Faces should fill at least 40% of the frame
- Text should be large (at least 40pt) and positioned on the right or bottom
- High-contrast images look better on bright phone screens
Test tip: Before publishing, shrink your thumbnail to 150 × 84 px and look at it. If you can't immediately understand what it's about, crop tighter.
Frequently Asked Questions About Image Cropping for Thumbnails
Q1. What is the best image cropping technique for YouTube thumbnails?
The rule of thirds combined with face-centered cropping is the most effective technique for YouTube thumbnails. Position the subject's face or main element at a grid intersection point, and crop tightly enough that the emotion or content is immediately visible even on small screens.
Q2. What size should I crop my thumbnail to?
For YouTube, crop to 1280 × 720 pixels with a 16:9 aspect ratio. For Instagram posts, use 1080 × 1080 (1:1). Always match the platform's recommended dimensions before adding any text or graphics.
Q3. Does cropping an image reduce quality?
Yes, cropping removes pixels. If you crop heavily from a low-resolution image, the final result will look blurry. Always start with a high-resolution source image — at least 1920 × 1080 px — to maintain thumbnail clarity after cropping.
Q4. Can I use the rule of thirds for all thumbnails?
The rule of thirds works for most content types. However, centered compositions work well for symmetrical subjects, bold product shots, or thumbnails with a strong center focal point. Use your judgment — the rule is a guideline, not a strict law.
Q5. What is subject isolation in thumbnail cropping?
Subject isolation means cropping your image so the main subject (a person, product, or object) is clearly separated from the background. This helps viewers immediately understand the thumbnail without distraction.
Q6. How do I crop thumbnails for mobile viewers?
For mobile thumbnails, use tighter crops, make sure faces are large and expressive, and ensure any text is big enough to read on a small screen. Test by shrinking the image to roughly 150 px wide before publishing.
Q7. What tools should beginners use for thumbnail cropping?
Canva is the best starting point for beginners — it's free, web-based, and has preset thumbnail sizes for every major platform. For more control, Adobe Express or Snapseed (mobile) are excellent free options.
Wrapping It All Up
Thumbnails are your first impression — and cropping is the foundation of every great thumbnail. The best image cropping techniques for thumbnails include the rule of thirds, face-centered cropping, subject isolation, lead room, and platform-specific sizing.
You don't need fancy software or years of experience to get this right. You just need to know what to keep in the frame — and what to cut out.
Start simple. Use the rule of thirds on your next thumbnail. Crop tight. Remove the background clutter. Then watch what happens to your click-through rate.
Great thumbnails don't happen by accident. They're built with intention — one crop at a time.
